May 28, 2011

Spelt Pasta

As runners, A & I try to follow some generic pre-race mandates: hydrate the day before, solid night of sleep, coffee and pancakes two hours before the start. In terms of "carb loading," we're both a bit hesitant to use a race as an excuse to load up on bagels and white pasta. We generally have a pretty hearty intake of "good" carbs, so no real need to make changes leading up to race day. However, experimenting with an unusual type of flour somehow led me to make spelt pasta to fuel up for a 10 miler. We both enjoyed it so much, it's now become a new installation in our pre-race rituals!

Ingredients (makes 2 large or 3 moderate servings)
1 & 1/4 cups spelt flour
2 eggs
1/2 tsp salt
1 T olive oil
Note: You can also make this recipe vegan by replacing eggs with cold water.


1. In a small bowl, whisk eggs with oil. In a large bowl, combine flour and salt and mix well.

2. Make a "well" in the bowl of flour and pour in the egg mixture.


3. Using a spoon, start to add flour into the egg mixture in a circular motion around the egg pool. Continue to do this until most of the flour and eggs are combined- it should look crumbly.


4. Use your hands to "knead" the rest of the dry and wet ingredients into a solid form. Depending on the size of the eggs, you may have a bit of extra flour in the bottom of the bowl that doesn't want to mix in- you can discard this or add water a teaspoon at a time until the dough comes together. On the other hand, if it seems a bit too sticky, sprinkle in another couple tablespoons of flour.


5. Wrap your pasta dough in plastic wrap and let sit at room temperature for twenty minutes.

6. Using a Silpat or a clean, dry counter surface sprinkled with a bit of flour, press the dough out with your hands into a rough square shape.


7. Roll out the dough as thin as you can- you may want to break your dough into two batches if you're using a Silpat as my entire surface was covered and my dough was still not quite as thin as I would have liked. In this case, the thinner the dough, the better.


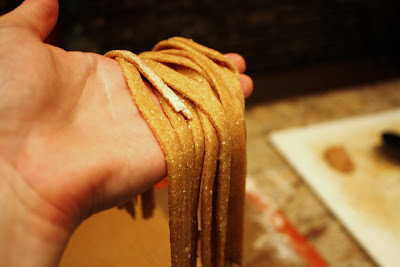
8. Use a pizza cutter or knife to cut the dough into thin strips. I was going for a linguine type size, but you could also make lasagna noodles or, if you're talented, a flat spaghetti.


9. Bring a pot of water to a boil. Separate the noodles from one another- sprinkle with a bit more flour if it seems sticky, though I didn't run into any issues here.


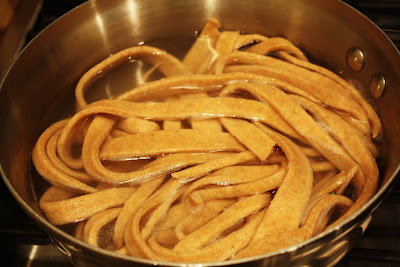
10. Boil the pasta for 4 to 5 minutes. Since mine was a little thicker, I left them in for 6. The pasta will puff up considerably, which is why you really want to roll it out thin.


11. Drain and serve! For this rendition, I made a spinach pistachio pesto while the dough was "resting." A roasted broccoli, zucchini, and grape tomatoes and sauteed a few shrimp. Topping with a bit of grated Parmesan completed the meal.


12. If you don't want to eat all of the pasta immediately, refrigerate uncooked pasta in a sealed container or Ziploc for up to two to three days.

This pasta is completely different from your standard store-bought boxed crap pasta- a nutty depth of flavor for those of you who enjoy an intense whole wheatiness. The texture has a bit of a grain to it as well and the linguine size has a substantially firm bite. Overall super hearty and delicious. And who knew- making your own pasta is absurdly easy!

May 25, 2011

Mama Palma's

The idea of a "neighborhood favorite" dining spot is rather nice- that one place you can always depend on as a nearby, no-hassle, familiar restaurant that provides a solid meal. Maybe not anything mind-blowing, but genuinely heart-warming food. We know a few friends who classify Mama Palma's in this category- a small, family friendly Italian cafe complete with a wood-fired brick oven for pizza production. A & I pass by every day on our way too and from University City, and we've made many comments about how convenient it would be to just stop for dinner one night after a particularly long day in the lab.

Although this wasn't quite the case at the time, we were in the market for a casual dinner location to start out a busy weekend. Granted, this was hardly our first visit. After a few visits during college as well as a more recent dinner with the parents, we're pretty familiar with the Mama Palma's scene. One thing we have never tried is their "famous" warm polenta bread plate ($9), so it was an easy choice to start the meal.


A went through a stage at one point where she was obsessed with anything made from corn, and polenta never fails to hit the spot. We were imagining some sort of crispy polenta base with a few toppings. We were more than a little surprised when we were served a rather regular looking pizza cut into bite-sized pieces. The flavors here were fantastic- a doughy bread base, a thin layer of super sweet, creamy polenta, fresh corn, and grilled peppers, finished off with a drizzle of pesto, a sprinkle of rosemary, and a shaving of parmesan. Random? A little. Delicious? Absolutely. However, we still think they should market this a little differently- it's really just like polenta and veggie covered Pokey Stix.


Pokey Stix, for those (sad few) of you who don't know what these are Source

Obviously the meal wouldn't be complete without a hefty serving of veggies, so we split a Greek salad ($11.75). A big pile of romaine, cucumbers, red onion, tomato, and probably $11.75 worth of fresh peppers- green, yellow and orange- were well complemented by kalamatas, a crumble of feta, and a few grinds of ground pepper over the top. The viniagrette was the highlight of the dish- lots of fresh mint, parsley, and oregano in a light balsamic base. We received mint in our CSA last week, and let me tell you, it makes any salad insanely delicious. This one was no exception.


A's boyfriend ordered a classic pasta dish- the chicken parm ($15). A large chicken breast is flattened out, deep fried, smothered with cheese and topped with tomato sauce. A no fail choice, right? While he seemed to enjoy the dish, A and I both tried a bite and were not impressed. The chicken was way too thin, causing it to overcook and ruining the meat to outer crisp ratio. Both the sauce and the pasta were just bland, and the whole thing was barely lukewarm. If you want boring, mediocre food, order this. It certainly didn't inspire me to want to try any of the other pasta dishes.


Of course we couldn't get out of here without getting a pizza. The list of options is absolutely endless, but we settled on a small veggie "Gourmet Delight" ($10.25). Eight inches of their standard super-thin crust is topped with red sauce, a generous amount of artichoke hearts, asparagus tips, and small blobs of goat cheese. Thinly sliced basil and grated parmesan top it off- no gooey mozzarella on this one. Overall the pizza is extremely light. As in, I could eat a whole one myself and not even notice. Although the flavors were enjoyable, this seemed more like a flatbread appetizer than a meal. Thankfully we had plenty of other food, otherwise the unsubstantial crust needs to be counterbalanced by some heavier toppings. We like our crust thick and chewy, and this pretty much falls in the category of "the opposite of what we like."


While our food was overall "pretty good", Mama Palma's missed the mark on becoming our neighborhood go-to. The service was adequate, but we've never felt totally welcomed by the staff. On busier nights, they're quick to remove every empty dish, as well as your water/drink glasses so that you're essentially forced to leave when they want you to. I understand that a restaurant is a business, but I also think the customers could be treated a bit more kindly. The fact that it is cash only is another negative in my book, and it's not inexpensive. Though conveniently located, we'll likely remain infrequent patrons.

What's your neighborhood favorite?

Mama Palma's
2229 Spruce St (@23rd)

May 23, 2011

Parc

Living around the corner from Parc, I spend a lot of time walking by this admittedly very visually appealing restaurant. With its outdoor seating, open windows, and very European flair- plus, it's ALWAYS bustling, no matter the day of the week or time of day- I can't help to be drawn to it. Of course, I've had a few meals there as well, always impressed with the menu, the service, and the general atmosphere. However, I don't love it as a dinner spot- I find it slightly overpriced and therefore usually out of our budget. For the mid day meal, though, it's almost perfect- especially for a leisurely weekend brunch.

Uwishunu

My boyfriend gifted me (many months ago) with a dinner out- my choice- but I defaulted to brunch instead (due mostly to the busyness of our schedules, which is clearly an issue since it took me this long to cash in). Parc seemed the most obvious option, and we incidentally chose one of the most beautiful mornings to enjoy the open-air dining. We made reservations, which excluded us from the sidewalk seating (first come, first served only), but the hostess exclaimed, "I have a great table for you!" as she led us to a spot right inside the giant open windows. Perfect for people watching, I noticed the eclectic mix of our fellow diners- women with giant shopping bags and bright pink tracksuits, couples with their dogs, and even a guy wearing a t-shirt and swim trunks. Parc has a classy feel, but during brunch is as casual as it gets.

I started my morning with a cappuccino ($4.50), an artfully created delicious mix of cream and caffeine. I honestly felt I could sit and sip this while continuing my socially acceptable voyeurism people watching for the entirety of the morning.


Our waitress was great; cheerful, helpful, and always there right when we needed her (service is something of which I find most Starr restaurants continuously excel). Just a minute or two after taking our order, a bread basket arrived. Since we had ordered the Breakfast Pastries basket, we were a little confused, but each grabbed a small piece to tide us over until our food arrived... which was literally 60 seconds later, at the arrival of said Breakfast Pastries ($10). We now awkwardly had two bread baskets on the table, one of which was completely unnecessary. The regular bread basket is generous and delicious- three types of house-baked bread, including one of the best baguettes in the city. I often walk by Parc wondering if any of the diners would mind if I scooped their bread leftovers. Unfortunately, this morning, it was superfluous.


While contemplating which breakfast pastry to attack first, our entrees arrived. Having no idea how the order was brought to the kitchen, the food was prepared and plated, and then delivered from kitchen to table so quickly, I wasn't sure whether to be blown-away impressed, or a bit irked. My biggest restaurant pet peeve is being rushed, and with our small table literally filled to the brim with food in less than ten minutes after sitting down, I felt a tad overwhelmed. Nonetheless, it all looked delicious, so we dove in as best we could. If you order one item at Parc during brunch, it really should be the pastry basket. The menu described it as a collection of "croissant, pain au chocolat, apple turnover, blueberry muffin, and pumpkin spiced bread" but I believe it was a bit outdated. Instead, we received the croissant, the pain au chocolat, and the muffin, but instead of the turnover and pumpkin bread, received a golden raisin scone and an iced lemon poppy bread.


It's a lot of pastries, but split them among two or more and it's very manageable- and you get a taste of so many items. The scone was by far my favorite, a dense, sweet, crumbly creation (and I'm not even a fan of raisins!). The blueberry muffin is a staple, and is always perfectly light and fluffy with a crunchy streusel topping. The lemon loaf provided two tiny slices of moist, lemony goodness. We then saved the croissant and the chocolate-filled pastry as we tackled our entrees.


The bf was eyeing the buttermilk pancakes, but after convincing him we needed the pastries, he went with the Two Egg breakfast, which is Parc's take on the classic diner meal. Creamy scrambled eggs with bits of herbs, a heap of perfectly cooked chunky breakfast potatoes, thick slices of Nueske bacon, and a fat piece of buttery brioche toast ($12)-- if I had to eat this meal anywhere, I think I'd want it at Parc. I won't lie, I definitely had a twinge of food envy.


Don't worry, my own food was even better (in my opinion)- the Smoked Salmon Tartine ($12). I admittedly have a smoked salmon addiction, and have a hard time going through any brunch without it. This open faced sandwich was a perfect transition from the breakfast-y coffee and pastries to the more time-appropriate lunch. I thankfully was able to use this dish as an excuse to eat that famous baguette, sliced open and topped with horseradish creme fraiche, smooth, fatty salmon, capers, thinly sliced red onion, and sprigs of dill.


The accompanying side salad fulfilled my constant need for fresh vegetables, crisp greens dressed in a very light shallot-y vinaigrette. I slowly worked my way through the meal, savoring each bite and just enjoying the experience, the food, the sunny day, and of course the company.


We finished our meal by splitting the final two pastries, the croissant (smeared with a tad of the seedy raspberry jam) and the pain au chocolat (a great dipper into the remnants of my cappuccino). As we left, simply walking out through the open windows onto the sidewalk, I felt completely satisfied with both my restaurant AND meal choice. I find brunch, especially those of the slow, luxurious variety shared with those you love the most, to make everything right in the world.

Parc
227 S. 18th Street

May 20, 2011

Hao's Chocolate Chip Cookies

Growing up, our mom's specialty in the kitchen was chocolate chip cookies (oh, and pumpkin bread!). We used the recipe on the back of the Tollhouse chocolate chip bags, which I've heard is a very popular one. The end result was a jar full of thin, slightly crispy cookies (and stomach aches from eating too much raw dough). These cookies have always been my favorite- both in flavor/texture and in the comforts of childhood memories they provide. But recently, they've seen some major competition. During J's frequent trips to Boston, she began raving about "Hao's cookies." Apparently, her boyfriend's roommate was quite the cook. I was a little skeptical-- some young Asian guy makes better chocolate chip cookies than my mom? Eventually, I was lucky enough to be gifted a cookie that somehow made it through the trip back to Philly (surprising, since they apparently don't last long), and became an instant convert.

As we planned our recent trip to Beantown, I practically begged that we include learning the magical recipe in our itinerary. I was lucky enough to be granted my wish, and now I feel obligated to share it with you!

For Hao's cookies, you will need:

(No. Seriously. Go to the store right now.)

2 sticks butter (1 c.)
1 scant c. white sugar
1/3 c. light brown sugar
1/3 c. dark brown sugar
2ish c. all purpose flour
3/4 tsp. salt
3/4 tsp. baking soda
2 eggs
1.5 tsp vanilla extract
1/2 bag (5 oz) milk chocolate chips (preferred: Ghiradelli)
1/2 bag (5 oz) dark chocolate chips (preferred: large chips or chunks)

First step: melt the butter. We would typically do this in the microwave, but the recipe master insisted on doing it stovetop, and we don't want to mess with a good thing. Once it's fully melted, remove from heat.


In a large bowl, combine all three of your sugar varieties. If any chunks exist in the brown sugar, make sure to break them up. Then, add the flour, the salt, and the baking soda, and mix well. Unlike other cookie recipes, the wet ingredients and the dry ingredients aren't combined separately and then added together, but instead, each ingredient is added to the same bowl one at a time.


Crack the eggs into the bowl and add the vanilla extract without mixing them in. With a fork, prick the egg yolks until they run into the flour. Quickly pour the melted butter over the top, and begin mixing immediately- since the eggs aren't incorporated yet, there is a small chance they'll begin to cook from the heat of the butter (we're trying to avoid that). Mix until everything is well combined; the end product should be very shiny and fairly moist.


Finally, add in the chocolate chips/chunks. The bigger the better-- large quantities of high quality chocolate chips are a key ingredient for these cookies. Since the dough is slightly warm, the chocolate may begin to soften. No problem-- just pop it in the fridge to cool things off and help solidify it a bit for better cookie shaping. Minimum fridge time: 20 minutes. Optimal fridge time: several hours, or even overnight. If you know us at all, you know what we decided on- quickest time to cookies possible.

Chips of Choice


Once you're done impatiently waiting, preheat your oven to 375 and prepare your cookie sheet. Yep, sheet. Unless you have an industrial oven, our tutor recommends baking one set at a time to prevent overcrowding and disrupted heat flow. Cover your pan with a silicone baking sheet or tin foil- no greasing necessary. Remove the dough from the fridge and begin shaping your cookies. This is also a very critical part. Listen carefully: grab a large chunk of dough and roll it into a smooth, tightly packed ball. Is it 2" in diameter? Good. Are the chocolate chips evenly distributed? Good. Place it on the bake sheet. If not, add more dough as necessary. Make sure your dough balls are well spaced on the sheet- they spread pretty far and nobody likes a huge amorphous cookie blob. Except me.


After you've created about 8 large cookie dough balls, the sheet should be finished. Pop it in the oven (middle rack) and bake for 11 minutes. Since your oven isn't the same as my oven, there is a good way to know when they're finished- lift one and examine its bottom. If it's lightly browned, you're good to go. Otherwise, keep them in the oven for another minute or two- by 14 minutes, they should be done (if not, you might want to get your oven checked).


Move the cookies to a wire rack (or just a sheet of tin foil on the counter) and continue shaping and baking until you're out of dough. The recipe should provide about 22-25 cookies (if you produced the right size dough balls). The size and density of the dough you shape has a huge impact on the texture and weight of the cookie you produce-- if you do it right, you'll end up with a huge, very thick cookie with an ever-so-slightly crispy bottom, a soft, satisfying bite, and the perfect amount of chocolate chunks providing a touch of crunch. The blending of the melted butter and the uniform sphere production also helps to minimize crumbs- these cookies won't break or crumble when you bite into them. It doesn't get any better than this. Huddled in the kitchen around the first batch, an unnamed accomplice proclaimed, "These cookies are the sh*t." Yes. Yes, they are.

May 16, 2011

Zaftig's

After almost two years of a long distance relationship that has involved numerous trips to Boston, I finally convinced A to come along for a weekend visit. This allowed me plenty of time to amass a weekend's worth of "favorite" spots to eat that I could now share with A. In my opinion, a weekend in Boston is not complete without a late brunch at Zaftig's, a Jewish-style deli in Brookline. It's no secret that this place is good- we typically wait at least an hour for a table, and it has won a series of accolades that would make any successful restaurant envious.


We're typically served bagel chips with a sweet cream cheese spread to snack on while we wait, but they didn't seem to be offering it this weekend. Quite sad. We spent a decent amount of time weighing our options (and there are MANY on this menu), and I eventually decided on something I hadn't tried- the quiche and mixed greens ($9.95). I chose the ham and cheese version over the veggie, which I am sort of regretting. The quiche certainly had potential- a flaky crust, thick layer of firmly cooked eggs encasing chunks of ham, caramelized onions, and shredded cheddar. However, I think the premake-and-reheat combination for this type of dessert dish did not do it any justice. The eggs ended up a bit rubbery and the crust gummy. A good smear of ketchup helped, but thats not typically my style. The mini side salad was great- dressed simply with olive oil & lemon juice and a touch of salt and pepper, just the way I like it. The greens hid a surprise pile of sweet, ripe strawberries.


Since I'm a bagel fiend, I also ordered a whole wheat bagel on the side ($2), which comes with a healthy serving of cream cheese. Lightly toasted with a nutty flavor, chewy and slightly sweet. It's hard to get a good bagel in Philly (recommendations welcome) which makes ordering a fresh bagel from Zaftig's a must.


A ordered a couple of smaller items, starting with a cup of cold borscht ($3.75). The thin beet soup had a terrific flavor with lots of interesting additions- a solid golf ball blob of cream cheese, chopped potatoes, scallions, and (my favorite) chunks of half-sour pickles. The cup was a notably small serving, exacerbated by the deliciousness of the soup- just a good mix of ingredients that was easily something that you would want to continue eating long after it was consumed.


She also ordered something off the starter menu, the loaded latkes with smoked salmon ($8.95). At the base of the pile was a small dollop of dill sour cream. Next up, a dense ball of thick shredded potato well-crisped in the deep-fryer. A few slivers of smoked salmon and then the layers repeated. Trout roe added an extra dimension of smoky saltiness. The latkes themselves were a good inch and a half thick, and A likened them to "giant McDonald's hash browns" (a good thing, in her book). So while the latkes were quite satisfying, their size called for a bit more of the other ingredients to even out the dish.


My boyfriend ordered one of our favorites, the breakfast sandwich ($10.95), typically served on an english muffin, but is of course, far better when consumed on a bagel ($1 extra). Two drippy fried eggs, two thick slices of grilled ham, and a slice of fresh tomato are smothered in melted muenster cheese. This sandwich is for hungry people only.. it is a serious beast to conquer. The simple mix of breakfast staples seem to increase exponentially in flavor when paired together. Arguably the best breakfast sandwich I've had. A side of crispy home fries and a few random pieces of fruit finish the plate, but the sandwich itself is most certainly the star of the show.


Even though this trip wasn't the absolute best of my meals at Zaftig's, it's such a fun and cute atmosphere- bustling waitstaff zipping around attending to patrons chatting animately with friends and family (lots of kids!). The coffee is capped off with diligence, and any odd requests to alter dishes are appeased without a blink of the eye. My positive feelings about this place can't be dimmed by a dry quiche or missing bagel chips- there's always something new (or an old favorite) on the menu to look forward to on your next visit. If you're shipping up to Boston, make sure to check it out.

Zaftig's Delicatessen
Brookline, MA

May 13, 2011

Rhubarb Tarts

We received our first CSA delivery last week (whoohoo!) and it certainly came with an interesting assortment of veggies right off the bat. We found a few good recipes for mizuna (this salad recipe is a must-eat) but were at somewhat of a loss for what to do with a few stalks of rhubarb. A found a couple of interesting savory recipes that called for a quick toast in the oven. However, since it didn't really fit in with our menu plan for the week, we decided to try our hand at a more typical recipe- rhubarb tarts.

We prefer making individual sized desserts- easy portion control and provides the option of popping a few in the freezer if we're not going to be around to consume them. With an impending weekend in Boston, the use of our tartlet pans was a necessity.


The construction of these tarts was relatively haphazard, somehow piecing together three different approaches. We didn't want to make a pastry dough, so we sought out an almond-meal based crust instead- we eventually landed on this recipe for inspiration. First, grind 1.5 cups of sliced almonds in a food processor until it becomes a coarse meal.


To this, we added the rest of the dry ingredients: 1/3 cup oats, 1/4 t salt, 1/4 t baking soda. In order to make a cohesive dough, add 1/4 cup of melted butter and 1 T agave nectar to sweeten the deal. Once everything is well combined, press the sticky crust into cooking spray-coated tart pans. The crust can be as thick or thin as you'd like and you can either press the dough against the sides (to make a true tart) or not (to make more of a layered streusel). This recipe makes enough for about six 4" pans.


A popped these in the fridge for a half hour so she could work on dinner simultaneously. The time in the fridge helps the ingredients meld together a bit better and "set," but is not necessary. Additionally, we prebaked our crust for 10 minutes at 350F since we made ours rather thick. A thinner layer or true pastry dough won't need this step either.


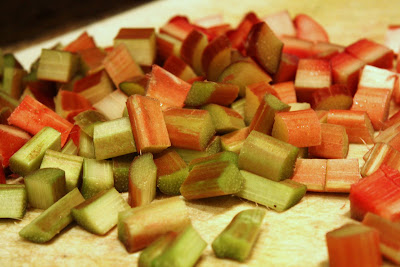
We went a much simpler route for the filling, following a basic rhubarb pie recipe. Simply chop the rhubarb as you would celery and saute it over medium heat with 3/4 cup sugar (or more or less sugar depending on how sweet you like your treats) and a teaspoon of vanilla for about ten minutes. We had five large stems of rhubarb which equated to about two cups once chopped. As the rhubarb cooks, it emits lots of water, mixing with the sugar to create a really nice pie filling texture.


While the rhubarb was cooking down, A mixed together a streusel topping that she oftentimes throws together for a quick dessert (top a chopped apple with a few tablespoons of this and microwave for a few minutes... 3 minute apple pie). This time she incorporated more of the almond meal to keep the flavors and textures consistent. Combine 1/2 cup almond meal, 1/2 cup oats, and 1/2 cup brown sugar. Chop 2 T of cold butter into small cubes and fork this into the dry mixture along with a tiny pinch of salt.


When the rhubarb is cooked down, spoon about 1/4 cup of the mixture over each crust. Sprinkle with 1/4 cup of the streusel topping mixture. Bake at 350F for 25 to 30 minutes, or until the topping caramelizes a bit. Cool on a wire rack.


I prefer my pie-type desserts eaten cold, particularly this rendition. The crust and topping have a nutty flavor base, amplified by the sweet and salty undertones. The rhubarb itself is pretty tart (no pun intended) which, when served warm, is the dominant flavor.


Even though we made up this recipe as we went along, it turned out pretty well. We used up some ingredients that we had on hand, and got three nights worth of dessert out of the deal. This is a great example of how our CSA really has us reaching our creative limits in the kitchen. Can't wait to see what next weeks haul has us making!