 |
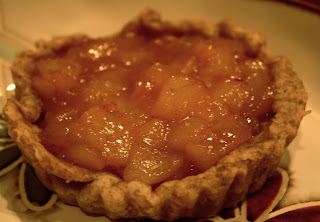
| The Tartlets. |
Easy Lemon Cheesecake
(Gluten Free)
For the crust:
1/2 c. almond meal
a pinch of salt
2 tbsp. brown sugar
1.5 tbsp melted butter
For the filling:
6 oz. cream cheese (low or full fat)
2 tbsp. greek yogurt or sour cream (low or full fat)
1/4 c. sugar
1 egg
1 tbsp. lemon zest
2 tbsp. lemon juice
A traditional cheesecake is often made with a graham cracker crust-- but without any graham crackers on hand, I chose to make an almond based crust. Trader Joe's actually sells almond meal for a fantastic price- cheaper than buying whole almonds and grinding them yourself. However, if you only have 'em whole, it's easy enough to make-- stick them into your food processor and let it go for a minute or two.
 |
| Fancy camera work, no? |
The butter in the mix prevents it from sticking, so no worries about greasing the pan(s). Make a smooth, even layer at the bottom, packing it in to make sure there are no gaps. Bake the crust for 6-8 minutes at 350- just enough to help firm it up.
While the crusts were baking, I got to work on the filling. This was literally one of the easiest desserts I've ever made. With a handheld beater (a KitchenAid-type stand mixer would work as well), cream together the yogurt, the cream cheese, and the sugar until smooth (a minute or less!).
Add the remaining ingredients and continue to beat until everything is well incorporated. The filling will be on the wet side- for some reason I expected something thick, but it has the consistency of plain yogurt. Once your crust is out of the oven (I didn't even wait for it to cool), carefully pour the filling over the crust to your desired height. I split the recipe into four small cheesecakes, so they weren't particularly full. I loaded them onto a wire rack, but a baking sheet would also work. Technically nothing SHOULD drip out of the pans, but better to be safe.
Put the cakes back in the oven for 25 minutes at 350, plus or minus five minutes. Not very exact, I know, but it really will depend on your oven and the thickness of the cakes. When they're done they should look solid- you can carefully touch one to make sure it is no longer soft. My mini cheesecakes only took twenty minutes.
You'll want to cool these completely before removing them from the pans. The cooling process helps set them further- I stuck them in the refrigerator overnight. The firmer the filling, the more success you will have with the removal!
The lemon juice and zest gave the filling a rich yellow color, and I loved seeing the little dots of zest. Perhaps I was overly proud of my little baking success- most things I bake end up tasting fine, but rarely are they so beautiful.
The combination of lemon and almond isn't necessarily one I would automatically jump to but it worked well. Pre-baking the crust gave it a rich, roasted flavor that complemented the tang of the filling. With just a few tablespoons of sugar, the filling wasn't overly sweet, but just enough to even out the tartness of the lemon.
The ratio of crust to filling made each bite a mix of textures and flavors, and the small size made it perfect for an individual portion. The recipe is also easy to scale up or down, depending on your needs. I am really looking forward to making these again, in any number of possible flavors- chocolate peanut butter would be dangerously easy!


do you think i could make these in ramekins?
ReplyDeletesure-- if you don't feel the need to take it out to admire your lovely handiwork :)
ReplyDelete